Placing Objects & Variables
Placing Objects
A ladder diagram is made of objects tied together by links. To place an object in a project, select the object from the tool bar or the tool bar’s drop down menu. Position the pointer where the object is to be inserted and left-click. This “places” the object. Repeat this step for other objects as required.
The last placed object stays selected until a different object is chosen and can be placed multiple times without the need of re-selecting the object.
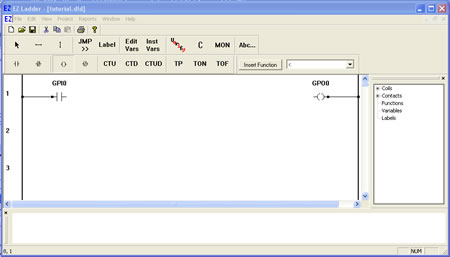
Now we will place 2 objects, 1 contact and 1 coil.
Your ladder diagram should look like this.
Moving Objects
Objects and functions may be moved around the ladder diagram workspace provided they are moved within their placement rules (ie: coils must only be placed near the right power rail).
To move an object, left-click on the object. Still holding the left mouse button, drag the object to the desired location and release the left mouse button. The object has been moved to the new position.
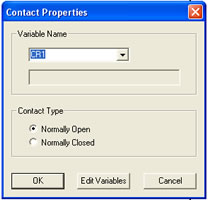
Inserting Variables
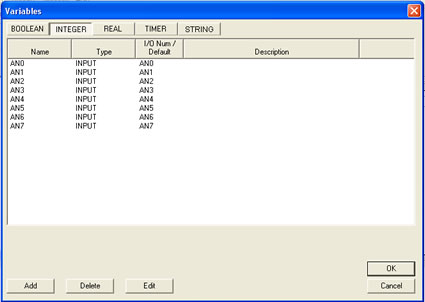
Note: When placing variables for functions, generally the output and input types must match (if an integer is selected as P1, then the other inputs and the outputs are locked to an integer type except for specific instances). When variables are inserted near functions, only the first variable placed may allow the selection of the type of variable (integer / real / boolean). Any addtional placements of variables to the same function will be limited to the first variable type (the other type "tabs" are not available).